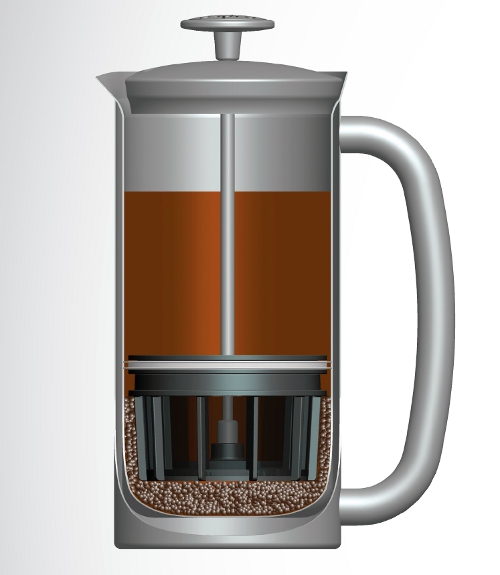
Making Coffee with Your Espro Press
SHIPPING BEGAN MARCH 29/12, ENDING APRIL 20/12
Presses head out to Kickstarter backers almost every day! We have shipped out 162 already, and our plan is to ship the rest by April 20. We appreciate your patience, as we work hard to get these presses out to you.
So here’s what this should mean for each of you…
1. You should expect your press to be sent by April 20th, maybe sooner!
2. Depending on where you live, it could take a week (within North America) or more (international) after that for you to receive your press.
3. If you have not received your press by May 1st (in North America) or May 15th (International) please contact us directly.
We realize that each of you is anxious to receive your press. We can’t blame you – the coffee from it is really good (as some of you have already found out). Rest assured – while we cannot reasonably tell each of you precisely when you will receive your press, it will be very soon!
SO – YOU HAVE RECEIVED YOUR PRESS IN THE MAIL. NOW WHAT?
STEP 1. UNBOX
The box contains an Espro Press and an instruction manual. Wash the press in warm soapy water before using. This is how the micro-filter assembles. Wet the o-ring to ease re-assembly.

STEP 2. MEASURE COFFEE
There are two lines in the container.
A full pot (top fill line) uses about 50 - 60 g coffee (no more than 3/4 cup or 175 ml), and ~1000 ml of water.
A 3/4 pot (bottom fill line) uses about 38 - 45 g coffee, and ~750 ml of water.
STEP 3. GRIND COFFEE
Use a coarse grind, for a French press. The grind should look about like this.
Grind with a burr grinder, not a blade grinder. Blade grinders don’t control grind size, so every brew will be different. Grinding just before brewing is best.
STEP 4. HEAT WATER
Coffee brewed with boiling water is bitter, and brewed with cool water is sour. Use some of the water to preheat the press, and let the kettle sit for a minute or two. Ideal brew temperature is 195 – 205 °F (91 – 96 °C).
STEP 5. BREW
Start a timer for 4 minutes, put the coffee into the press, and fill with water to the appropriate line. We like to give the grinds a slight stir (or swirl) half-way through, to mix the floating grinds. Insert the filter and lid (don’t press down yet!) to keep in the heat.
STEP 6. FILTER
Press the filter slowly to the bottom. Hold onto the handle of the container and press straight down to keep it stable.

STEP 7. ENJOY!
Enjoy the aromas and flavours of the coffee you have brewed! We deliver the science of making coffee, so that you can master the art.
Please be careful, as coffee from the Espro Press is HOT! Also be careful, as the lid and knob at the top can get hot after pressing.
STEP 8. WHEN YOU’RE DONE, IT’S TIME TO CLEAN UP
Remove the filter (carefully, as it may be hot). Pour out the grinds, and wash the container with a soapy cloth. Clear out the sink – the press won’t break, but glasses in in the sink might!
There are three options for cleaning the filter.
1. separate the top and bottom filter, and clean with a soft bristle brush
2. dishwasher, top rack only
3. fill press with soapy water and press filter up and down, rinse
Assemble the top and bottom filter when wet, to ease assembly of the o-ring.
INSTRUCTION MANUAL
For those that would like a sneak peak at the instruction manual, you can see it here.
Let us know your thoughts! info@espro.ca
 Saturday, April 7, 2012 at 9:49 AM |
  Email Article |


